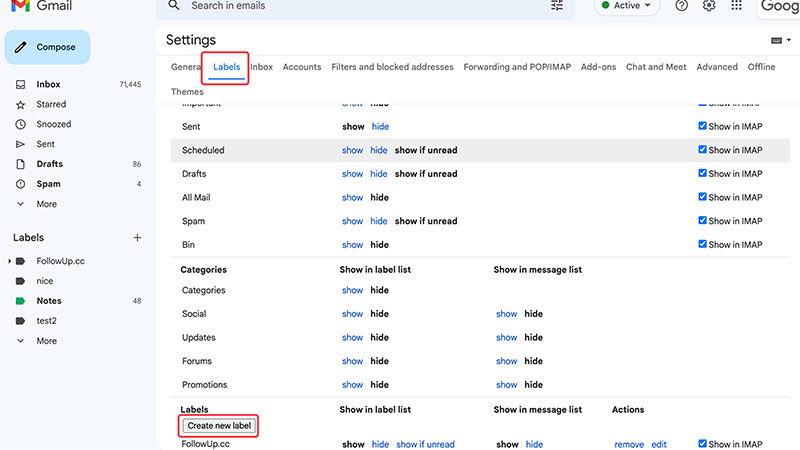
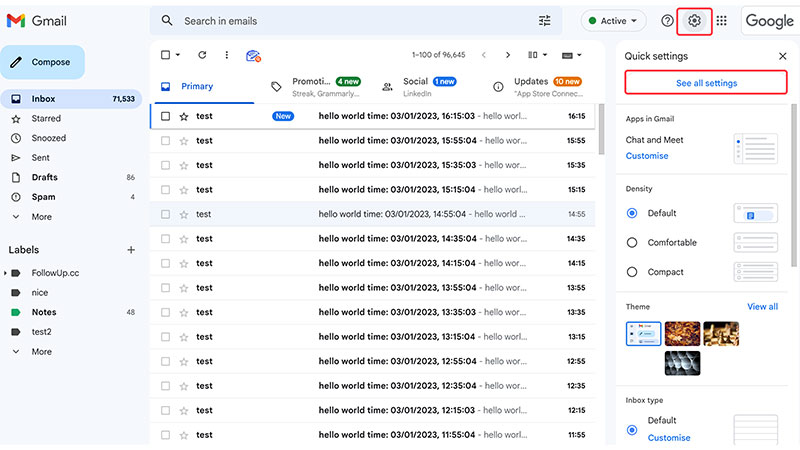
Labels in Gmail allow you to organize and categorize your emails in a way that makes sense to you. Whether you want to create labels for different projects, clients, or simply to keep your inbox organized, labels can be a useful tool. 1. Login to your Gmail account and click on the gear icon in the top right corner. From the dropdown menu, select “Settings.”
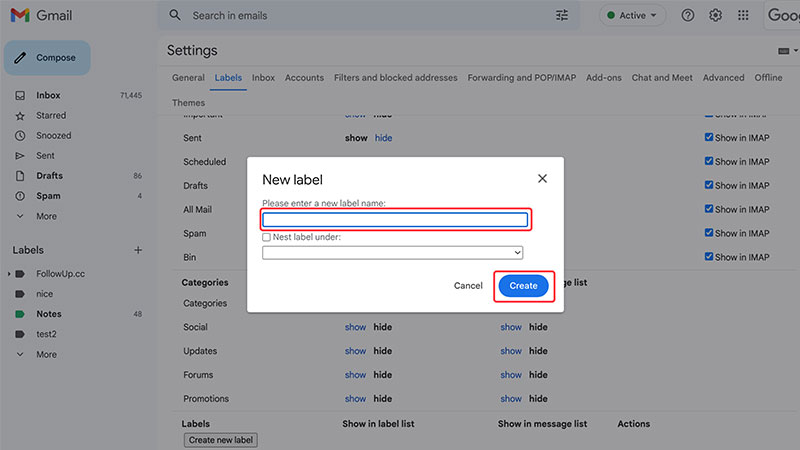
2. On the Settings page, click on the “Labels” tab. This will bring up a list of all the labels you currently have in your account. To create a new label, click on the “Create new label” button. A pop-up window will appear where you can enter the name of your new label.
3. Enter the name of your label in the “Label name” field. You can also choose to nest your label under an existing label by selecting it from the “Parent label” dropdown menu. When you’re done, click “Create” to create your new label. Your new label will now appear in the list of labels on the Labels tab.
4. the label can be seen at the left side bar
5. you could drag the label to email (ADD label to email), or drag email to label (MOVE the email under the label)
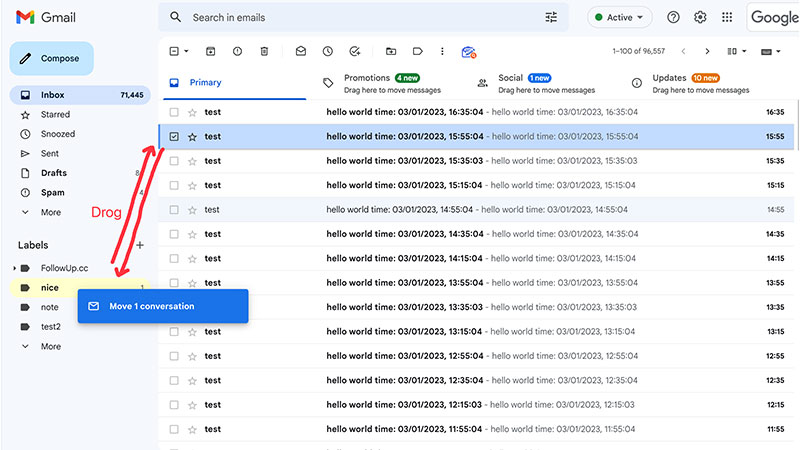
How to add emails to your new label?
Select the email or emails you want to label and click on the “Labels” button. From the dropdown menu, select the label you want to apply. The selected emails will now be labeled with the chosen label.
You can also edit or delete labels at any time by clicking on the “Edit” or “Delete” buttons next to the label in the list on the Labels tab.
How to view emails with a specific label?
Click on the label in the list on the Labels tab. This will bring up a list of all the emails with that label.
Use labels to filter emails in your inbox
1. On the Settings page, click on the “Filters and Blocked Addresses” tab.
2. Click on the “Create a new filter” button.
3. In the pop-up window, enter the criteria you want to use to filter your emails. For example, you can filter emails based on the sender, subject, or label. When you’re done, click “Create filter.”
4. On the next screen, you can choose what you want to do with the emails that meet the criteria you specified. For example, you can choose to have the emails automatically labeled or skip the inbox and go straight to the trash. When you’re done, click “Create filter.”
By following these steps, you can easily create and use labels in Gmail to organize and categorize your emails. Whether you have a few labels or many, labels can be a helpful tool for keeping your inbox organized and making it easier to find specific emails.